We decided that our first project to tackle would be the kitchen. Here is a little video of the before:
*for some reason this only plays in Internet Explorer.
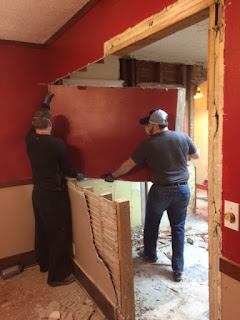
Similar to our last home, as soon as the ink dried on our mortgage papers, we headed over to the house for demo. After an hour of intense work, here is what she looked like:
First, we had to take out each of the cabinets. Next, came the ridiculous faux brick paneling. Behind the paneling was plaster and then a layer of lath that all had to come down. We were ripping this kitchen down to the studs.
We wanted to open up our kitchen, so we decided to knock down half of the wall that separates the dining room and kitchen. This will now become a peninsula with our sink and dishwasher. (Yes, we did have a contractor tell us if it was load-bearing or not.)
Once the walls and ceiling were demo'd, up came the floor. I was crossing my fingers for some original hardwood- and I got it! This is what was underneath 4 layers of linoleum:
We tried several methods of removing this glue/ paper combo, but the only thing that worked was super hot water and Murphy's Oil Soap.
The glue became a really nasty sludge, which we had to shovel into the trash. Here's what it looked like after three days of demo:
Already.so.much.better.
We haven't been able to make much progress since we've been waiting a lot on our electrician and drunk plumber. Jeff was able to make a half wall to block off the former "nook" area, as well as drywall the left side wall, which doesn't have electrical.
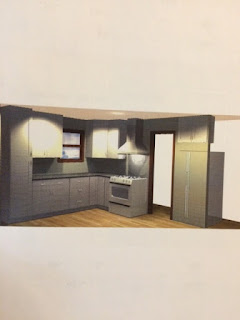
As I said before, we are doing a little rearranging of the layout with this kitchen. The wall that used to separate the kitchen from the dining room has now become a peninsula, which will have a bar top built into it. The water had to be moved from over by the window to our new sink area. We also switched from an electric stove to a gas stove. We had a professional do that part for us so we don't blow up our new house. The nook area will eventually have a door to the outside installed in it, so it will become a mudroom. We bought our cabinets from Home Depot because they had the best deal and the style we wanted. We decided that since we lost some of our cabinetry with removing part of the dining room wall, that we would order cabinets that go all the way to the ceiling. Not only will our kitchen appear taller, but now we have more storage than before!
Mock up of the kitchen from the peninsula corner.
Mock up of the peninsula while standing at the window.
We should have some more progress after this next week, so stay tuned. Cabinets arrive next week!
Kitchen to-do list:
Demo kitchenDesign kitchenRun electricalBuy light fixturesMove waterAdd gas lineBuild half-wall separating mudroomBuy appliances- Install drywall
- Prime and paint walls
- Sand and stain floors
- Install cabinets
- Install new appliances
- Trim work
- Buy new door to bathroom
- Buy and install new backsplash
- Measure and install countertops


